Yoghurt

photo Marina Oliphant

Food fermentation is a hot topic with chefs at the moment, for the complexity of flavour that it brings to a dish. Many different types of food can be fermented, but one of the easiest for the home cook to try is yoghurt. As the product of natural bacterial fermentation of milk, yoghurt is relatively easy to make yourself. It simply requires some milk and a little yoghurt to act as a starter. The live bacteria in the yoghurt convert the lactose in the milk into lactic acid, which gives yoghurt its characteristic tang. The acid causes the proteins to set into soft curds, which causes the yoghurt to thicken. It’s as simple, yet as complex, as that. There are many different types of milk and yoghurt available, so the combinations are endless. The milk can be from cows, sheep, goats, even camels or yaks.

The quality of milk is really important to the end product as yoghurt is simply set milk, so the better the flavour of the milk, the better the resultant yoghurt.

There is a certain sense of accomplishment as you delve into the food science experiment that is yoghurt making. See the recipe below for step-by-step instructions.

And even if you don’t have the time or inclination to make your own yoghurt, there are many kinds of yoghurt available commercially to enjoy.

The health benefits are high, as yoghurt is a good source of protein and calcium. It acts as a probiotic, aiding the natural bacteria in your digestive system.

So, for a little extra culture, just add yoghurt.

Homemade yoghurt with honey

Use good quality organic milk for best flavour and results. Use fresh yoghurt with live cultures (check the use by date) as this will have more live bacteria. Check the side of the tub, which will tell you whether there are live bacteria present.


1 lt milk

1 tbsp honey, plus extra honey to drizzle

1 cup plain yoghurt, with live cultures

Heat milk in a medium saucepan until it froths around the edges (around 85C on a digital thermometer), but don’t let it boil. Pour into a medium ceramic bowl and leave to cool until you can touch the side of the bowl with your hands (around 41C).

This is the ideal temperature for the bacteria to multiply. Now add the live yoghurt and something sweet (sugar or honey) to get things started. Cover tightly with cling film and wrap in a small blanket or thick towel to keep warm. Leave to sit for about 8 hours in a warm spot, for the yoghurt to form (an oven is ideal –should only be slightly warm and definitely not turned on). At this stage, it is ready to use or keep stored in the refrigerator for up to 4-5 days, where it will thicken a little more. Strain through muslin to thicken further, if desired.

Drizzle with extra honey to serve.

Makes 1 litre yoghurt.

Orange yoghurt syrup cake

This delicious, moist cake is perfect served warm from the oven with a little extra yoghurt on the side. 

photo Marina Oliphant


125g butter, softened

250g caster sugar

2 large eggs

1 cup Greek yoghurt

1 tsp pure vanilla extract

zest 2 oranges

3 tbsp orange juice

400g self raising flour

½ tsp bicarb soda

syrup:

1 cup caster sugar

1 cup water

4 tbsp orange juice

2 oranges, segmented

1 pink grapefruit, segmented

icing:

zest and juice of 1 orange

1 ½ cups icing sugar


Preheat oven to 180C.

Grease and line a 23cm cake tin with removable base.

Cream butter and sugar in an electric mixer until light and fluffy. Add eggs, one at a time and continue to mix until combined. Add yoghurt, vanilla, orange zest and juice and mix. Sift flour and bicarb and gently fold through.

Place mixture in cake tin and smooth the surface. The mixture will be quite firm.

Bake for 45 minutes, or until cake is cooked through.

Meanwhile, make the syrup. Combine sugar, water and juice in a small saucepan and cook over low heat to dissolve the sugar. Simmer for 10 minutes. Remove from heat and add citrus segments.

When cake is cooked, remove from oven and poke all over with a bamboo skewer, to make lots of small holes. Slowly pour the orange syrup over the hot cake until it is all absorbed and place the citrus segments in the middle.

Allow to cool, then remove from tin.

To make icing, mix orange juice and zest with icing sugar until smooth. Drizzle over cooled cake.

Tandoori chicken with mint yoghurt sauce

Tandoori chicken gets a makeover with a simple mint yoghurt sauce packed full of flavour. Perfect for your next dinner party.

 photo Marina Oliphant

1 small free range chicken

2 tbsp lemon juice

1 tbsp minced ginger

1 tbsp minced garlic

salt and pepper to season

1 cup thick plain yoghurt

2 tbsp tandoori spice paste

lime wedges to serve

mint yoghurt sauce

I bunch mint (150g), leaves picked

1 bunch coriander (100g), leaves picked

3 tbsp lemon juice

1 green chilli deseeded

½ red onion, chopped

1 tbsp minced ginger

5 tbsp Greek yoghurt

Joint chicken into 8 pieces (or ask your butcher to do this) and make 2 incisions with a sharp knife into each piece. Mix lemon juice, ginger and garlic then rub over chicken.  Season with salt and pepper and refrigerate for 20 minutes. Drain off any excess liquid and discard.

Mix yoghurt with tandoori paste, rub all over chicken and marinate in the refrigerator for 2 hours.

Preheat oven to 200C. Place chicken pieces on a wire rack in a roasting tray and cook for 15-20 minutes, or until cooked through. Remove from oven and rest for 5 minutes, covered with foil.

To make the mint yoghurt sauce, blend all ingredients, except yoghurt, in a food processor until smooth, then fold through yoghurt.

Serve with chicken pieces and fresh lime to squeeze.

Serves 4.


Shepherd’s pies

Shepherd’s pie

Image


Another great way to use leftovers, this time it’s the roast lamb. My children request this all the time. Easy to make ahead and simply reheat.


2 cups cooked roast lamb

1 onion, peeled and diced

1 tablespoon chopped parsley

salt and pepper

4 tablespoons tomato sauce

½ cup stock

1 ½ cups cooked mashed potatoes


Preheat oven to 180C.

Chop up roast lamb finely and mix with onion, parsley, salt and pepper, tomato sauce and stock. Check and adjust seasoning if necessary.

Place into individual ramekins and top with mashed potatoes.

Place in oven and cook for 20 minutes until top is nicely browned.

Remove from oven and serve.


Serves 4.


Prep time: 10 minutes

Cooking time: 20 minutes

Mr Wilkinson’s favourite vegetables

Check out Matt Wilkinson’s latest cook book. Photography by Jacqui Melville and styling by me, of course!

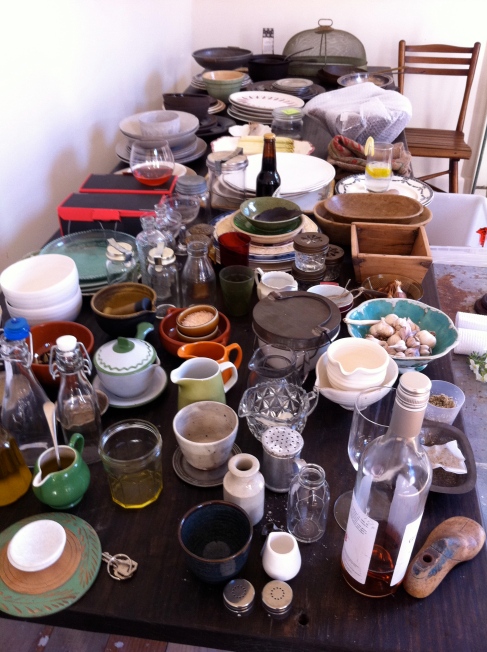
This photo shoot was so much fun. I had more props than ever before.

Image

These were some of the garden flowers that were used in backgrounds.

Image

This is where we shot the book. Page layouts on the back wall.

Image

Just a few props.

Eggplant

Image

With their gorgeous glossy skins in deep, rich hues of purple through to black, eggplants have a kind of mysterious beauty. Available in a cornucopia of other colours, shapes and sizes, keep an eye out for these more unusual beauties at farmers markets, Asian grocers and supermarkets alike.

The versatility of eggplant makes it an all-purpose vegetable that can be baked, sautéed, fried, grilled, boiled and braised. Slice it, shred it, cube it, dice it, stuff it, and definitely puree it, too.

Learn how to cook it properly and you will be seduced by its silky texture and delicate sweetness. Undercooked, it can be squeaky and spongy, unpleasant with little flavour.

The nutrient content of the eggplant may not be very exciting, but it is a good source of fibre, vitamins, minerals and antioxidants.

Because the flesh of the eggplant is so porous, it can absorb oil quickly. Brush lightly with oil just before cooking. Add a little water to the pan when sautéing to reduce the amount of oil required.

The historical journey of the eggplant through China, India, Southeast Asia, the Middle East and Europe into the Mediterranean diet has given us an infinite number of delicious dishes to try. Start with the recipes below and eggplant will surely become a favourite.


Baked eggplant with miso

Image 

A simple Japanese dish, this highlights the silky softness of eggplant, with a sweet miso dressing.


8 small long eggplants

1 tbsp olive oil

120ml mirin

2 tbsp yellow miso paste

1 tbsp sugar

1 tbsp roasted sesame seeds


Preheat oven to 180C.

Cut eggplant in half lengthways and score the cut sides with a sharp knife.

Place in a baking dish and brush with a little oil.

Cover with foil and bake for 40 minutes until the eggplant is very soft.

Mix the mirin, miso paste and sugar in a small saucepan over low heat for 3-4 minutes until combined. Drizzle the dressing over the eggplants and cook in oven for a further 5 minutes, or until it starts to caramelise.

Scatter over sesame seeds and serve.


Serves 4 as a side dish.


(Any extra dressing can be refrigerated in a covered container for up to 2 weeks).


eggplant dip

 Image

With a stash of this in your fridge, you will never have to buy dip again.

2 large eggplant

4 garlic cloves, skin on

juice 1 lemon

1 ½ tbsp tahini paste

2 tbsp olive oil

sea salt and freshly ground pepper to season


Preheat oven to 200C.

Make a few slits in the eggplants with a sharp knife and place on a baking tray with the garlic cloves. Bake for 1 hour or until very tender inside.

Remove from oven and allow to cool a little, then scrape out the flesh with a spoon. Place the flesh in a food processor and discard the skin. Squeeze the garlic out of its skin and add to the mix, along with the lemon juice, tahini and olive oil. Process to combine. Season with salt and pepper, if required.

Serve with crusty bread.


Makes approximately 2 cups.


Ratatouille

 Image

A classic French dish, this can be enjoyed as a meal in itself, or accompany anything from fish to chicken, sausages or grilled meats. The addition of fresh herbs and lemon juice at the end balances the richness of the stew.


2 ripe tomatoes

1 brown onion

1 yellow pepper

1 orange pepper

2 small zucchini

1 large eggplant

150ml olive oil, plus extra if required

4 garlic cloves, peeled and finely chopped

4 sprigs thyme

handful pitted black olives

6 anchovies (optional)

¼ cup baby capers

1 cup fresh basil leaves, roughly chopped

½ cup fresh mint leaves, roughly torn

zest and juice 1 lemon


Chop all the vegetables into similar size dice, approximately 1-2 cm.

Heat oil in a large heavy based frypan and cook eggplant in batches until golden. The eggplant will absorb quite a lot of oil, so you may need to add a little more, depending on the size of the eggplant. (add a little water as you go, to reduce the amount of oil required). Remove with a slotted spoon and drain on paper towel.

Add onion and peppers to pan and cook until softened. Add zucchini, garlic and thyme and continue to cook for a few minutes. Add the olives, anchovies and capers and heat through. Finish off with fresh herbs and the zest of the lemon and finally a squeeze of fresh lemon juice.

Serve immediately.


Serves 4-6.


Chocolate

Hit the sweet spot with these Valentine’s Day treats

photo Marina Oliphant 

Homemade + Chocolate = Valentine’s Day success.

Try these easy recipes and share a little love around.

When choosing chocolate for cooking, know your percentages. Basically, all chocolates contain various ratios of cocoa powder, cocoa fat and sugar.

The cocoa content is listed as a percentage. So “70%” refers to chocolate with 70% cocoa and cocoa fat and the remaining 30% sugar. The percentage indicates the balance between chocolate flavour and sweetness. The higher the percentage, the more bitter the chocolate.

For most baking, I use a chocolate with around 58% cocoa content.

Start with my fudgy chocolate brownies. Such a simple recipe, all made in one pot. The important principle for a perfect brownie is to get the baking time right; undercooked and it’s too gooey, overcooked and it’s cake. For moist and delicious brownie, you will need to take it out of the oven whilst it’s still very moist. A skewer inserted will be covered with lots of gooey crumbs. The top should be set, risen and slightly cracked.

For more baking, try the baci di dama (ladies kisses). These delicate little hazelnut and lemon flavoured biscuits are sandwiched together with dark chocolate. I prefer to use a bitter dark chocolate with a 70% cocoa content, but any good quality chocolate will do.

To spice things up, finish with my chilli chocolate truffles. The chilli adds warmth to the chocolate without being overwhelming. It’s a flavour combination that really works.

Hope these hit the sweet spot.


Fudgy chocolate brownies


Everyone should have a dependable brownie recipe. It’s important to get the baking time right, so check regularly with a skewer until the mixture looks set, yet still moist and slightly gooey.


250g unsalted butter

125g dark chocolate (58% cocoa content), chopped

2 cups caster sugar

4 large eggs

1 tsp vanilla essence

1 cup plain flour

¼ cup dutch cocoa

½ tsp salt

125g toasted walnuts, chopped

¼ cup dark chocolate chips


Preheat oven to 180C fan forced (200C conventional).

Lightly grease and line a 180 x 280mm rectangular shallow cake pan.

Heat butter and chocolate in a medium saucepan over low heat, stirring with a wooden spoon.

Remove from heat and stir in sugar.

Beat in eggs, one at a time and stir in vanilla.

Sift in dry ingredients and mix until thoroughly blended.

Stir in walnuts. Pour into prepared pan and sprinkle over the chocolate chips.

Bake for 45 – 50 minutes, or until a skewer comes out covered with lots of gooey crumbs. At this stage, remove from oven and allow to cool completely in pan.

Cut into rectangles.


Makes about 28.


Hazelnut and chocolate baci di dama

 photo Marina Oliphant

Baci di Dama means ladies kisses. They are like little mouthfuls of heaven.


¾ cup hazelnuts

1 cup icing sugar

125g butter, softened

zest of 1 lemon

1 cup plain flour

120g dark chocolate (between 58 -70% cocoa content)


Preheat oven to 180C.

Place hazelnuts on an oven tray and heat in oven for 5 minutes. Remove and place hazelnuts in tea towel. Rub vigorously to remove the skins. Allow to cool.

Process the hazelnuts with icing sugar in a food processor until finely ground.

Add butter and lemon rind and process until creamy.

Remove from processor and gently incorporate flour until just combined (do not over mix).

Use a teaspoon to scoop up a small amount of mix and roll into a ball. Place on lined oven trays, well spaced to allow for spreading.

Bake for 12-15 minutes until lightly golden, then cool on trays on a wire rack.

Melt chocolate in a glass bowl over a pot of just boiled water from the kettle or in a microwave on medium power for 1 minute or so. Stir until smooth and glossy.

Spread a small amount of chocolate on one side of the cooled biscuit, then sandwich with another biscuit. Repeat with remaining biscuits.


Makes 60 filled biscuits.


chilli choc truffles

 photo Marina Oliphant

You won’t believe how easy it is to make these delicious chocolate truffles. Use the best quality chocolate you can afford and you won’t be disappointed.


200ml thickened dream

1 long red chilli, chopped

½ tsp ground cardamon

½ tsp ground cinnamon

300g good quality dark chocolate (58% cocoa content)

dutch cocoa powder to coat


To a small pot, add the cream, chilli and spices. Heat gently to warm, then remove from heat and allow the flavours to infuse for 20 minutes. Strain the flavoured cream through a sieve to remove and discard the chilli. Bring a saucepan of water to the boil. Remove from heat. Place a heatproof bowl over the top and add the flavoured cream and choc pieces. Make sure that the bottom of the bowl doesn’t come in contact with the hot water underneath. Set aside until the chocolate melts. Stir well to combine.

Pour into a flat container (a plastic takeaway container is ideal) and refrigerate.

Scoop into small balls with a teaspoon or melon baller and roll gently in cocoa powder.


makes about 35 truffles.